Learn how to create your own audio visualiser
Created on Monday, 2nd January at 20:00pm
TLDR; All the files, demos, any bug-fixes are also available on
Github:
https://github.com/disruptionlaboratory/audio-visualiser-tutorial
1 Let's create a HTML page
Here is the audio file used in tbe tutorial: Download audio file
Here is the initial HTML markup. We're essentially normalizing the padding and margins across browsers, setting the page backgound colour to black and then adding canvas and script tags.
<!DOCTYPE html>
<html lang="en">
  <head>
    <meta charset="UTF-8" />
    <title>Audio Visual Example</title>
     <style>
      * {
        margin: 0;
        padding: 0;
        box-sizing: border-box;
      }

      body {
        background-color: black;
      }

      #container {
        width: 100%;
        margin: 0 auto;
      }

      canvas {
        width: 100%;
        height: 100%;
        margin-top: 20px;
      }

      audio {
        display: block;
        margin: 20px auto 0;
        width: 250px;
      }
     </style>
   </head>
   <body>
      <div id="container">
        <audio src="/assets/mixkit-casino-bling-achievement-2067.mp3" controls></audio>
        <canvas></canvas>
      </div>
      <script></script>
   </body>
</html>
We're also adding the Audio HTML Element so that we can play the example audio file, one that is free to use for our purposes today. However, feel free to replace this with your favourite audio music track.
2 Let's take a look at the Audio API
Modern browsers support the Audio API.
First we need to get a reference to the Audio element in the HTML page. Then we'll get the AudioContext instance and then we'll then call the AudioContext's createMediaElementSource method by passing it the Audio HTML element, which in turn returns the audioSource.
const audio = document.querySelector("audio");

audio.addEventListener("playing", (evt) => {
    const audioContext = new AudioContext();
    const audioSource = audioContext.createMediaElementSource(evt.target);

    // ...
});
We'll then get a new Analyser instance from the AudioContext.
// ...

const audioContext = new AudioContext();
const audioSource = audioContext.createMediaElementSource(evt.target);
const analyser = audioContext.createAnalyser();

// ...
There's a little bit of stitching things together to do: connecting the audioSource to the analyser, the analyser to the AudioContext destination.
Finally, some configuration: setting the anaylser fftsize property, creating a Uint8Array and then passing that array to the analyser's getByteFrequencyData method, which populates it with audio data.
//...

const analyser = audioContext.createAnalyser();
audioSource.connect(analyser);
analyser.connect(audioContext.destination);
analyser.fftSize = 64;
const bufferLength = analyser.frequencyBinCount;
const dataArray = new Uint8Array(bufferLength);
analyser.getByteFrequencyData(dataArray);
console.log(dataArray);

//...
The finished code should look something like this:
const audio = document.querySelector("audio");

audio.addEventListener("playing", (evt) => {
    const audioContext = new AudioContext();
    const audioSource = audioContext.createMediaElementSource(evt.target);
    const analyser = audioContext.createAnalyser();
    audioSource.connect(analyser);
    analyser.connect(audioContext.destination);
    analyser.fftSize = 64;
    const bufferLength = analyser.frequencyBinCount;
    const dataArray = new Uint8Array(bufferLength);
    analyser.getByteFrequencyData(dataArray);

    console.log(dataArray);
});
If you open up Dev Tools and inspect the console log, you will notice that the dataArray is a Uint8Array with 32 elements numbered from 0 to 31 and each element holds an integer between 0 and 255.
We'll be using these values to determine the length of the bars we draw on the canvas element.
3 Let's start visualising the data
The first thing we need to do is get the canvas object and the canvas context. We'll be drawing on the canvas element via the canvas context.
const canvas = document.querySelector("canvas");
const context = canvas.getContext("2d");

canvas.width = window.innerWidth;
canvas.height = window.innerHeight;

const audio = document.querySelector("audio");
audio.addEventListener("playing", (evt) => {
//...
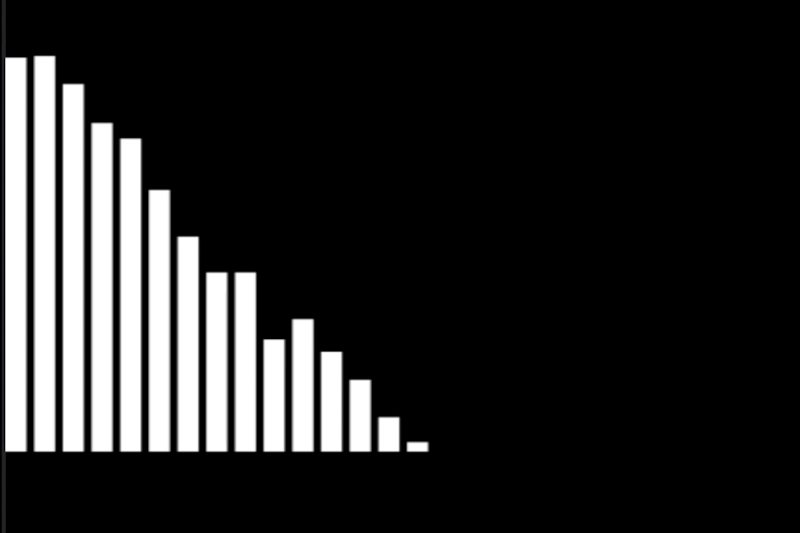
Let's add some code to draw the bars based on the values inside the dataArray. As usual, we're going to create an animate function which will do all the drawing. x will be the starting position and it will be incremented by the bar width each time. The barHeight is set by the value in the dataArray. The remaining code is drawing the bar and then calling the function again recursively so that it keeps repeating as the dataArray changes.
// ...
const bufferLength = analyser.frequencyBinCount;
const dataArray = new Uint8Array(bufferLength);
const barWidth = canvas.width / bufferLength;
let barHeight;
let x;

const animate = () => {
    context.clearRect(0, 0, canvas.width, canvas.height);
    context.fillStyle = "white";
    analyser.getByteFrequencyData(dataArray);
    x = 0;
    for (let i = 0; i < bufferLength; i++) {
        barHeight = dataArray[i] * 1;
        context.fillStyle = "white";
        context.fillRect(
          x,
          canvas.height / 2 - barHeight - 3,
          barWidth / 2 - 5,
          barHeight
        );
        x += barWidth / 2;
    }
    requestAnimationFrame(animate);
};
animate();
});
If you refresh your browser and play the audio, you should see something like this.
4 Let's experiment
Swap out the animate function with each of these in turn.
This example is similar to the previous one, but flipped.
const animate = () => {
    context.clearRect(0, 0, canvas.width, canvas.height);
    context.fillStyle = "white";
    analyser.getByteFrequencyData(dataArray);
    x = 0;
    for (let i = 0; i < bufferLength; i++) {
        barHeight = dataArray[bufferLength - i] * 1;
        context.fillStyle = "white";
        context.fillRect(x, canvas.height / 2 - barHeight - 3, barWidth / 2 - 5, barHeight);
        x += barWidth / 2;
    }
    requestAnimationFrame(animate)
}
This is a popular version, mirrored vertically along the y axis in the middle.
const animate = () => {
    context.clearRect(0, 0, canvas.width, canvas.height);
    context.fillStyle = "white";
    analyser.getByteFrequencyData(dataArray);
    x = 0;
    for (let i = 0; i < bufferLength; i++) {
        barHeight = dataArray[bufferLength - i] * 1;
        context.fillStyle = "white";
        context.fillRect(x, canvas.height / 2 - barHeight - 3, barWidth / 2 - 5, barHeight);
        x += barWidth / 2;
    }
    for (let i = 0; i < bufferLength; i++) {
        barHeight = dataArray[i] * 1;
        context.fillStyle = "white";
        context.fillRect(x, canvas.height / 2 - barHeight - 3, barWidth / 2 - 5, barHeight);
        x += barWidth / 2;
    }
    requestAnimationFrame(animate)
}
This will look like the finished version. It's similar to the one above but flipped along the x-axis along the bottom.
const animate = () => {
    context.clearRect(0, 0, canvas.width, canvas.height);
    context.fillStyle = "white";
    analyser.getByteFrequencyData(dataArray);
    console.log(dataArray)
    x = 0;
    for (let i = 0; i < bufferLength; i++) {
        barHeight = dataArray[bufferLength - i] * 1;
        context.fillStyle = "white";
        context.fillRect(
          x,
          canvas.height / 2 - barHeight - 3,
          barWidth / 2 - 5,
          barHeight
        );
        x += barWidth / 2;
    }
    for (let i = 0; i < bufferLength; i++) {
        barHeight = dataArray[i] * 1;
        context.fillStyle = "white";
        context.fillRect(
          x,
          canvas.height / 2 - barHeight - 3,
          barWidth / 2 - 5,
          barHeight
        );
        x += barWidth / 2;
    }
    x = 0;
    for (let i = 0; i < bufferLength; i++) {
        barHeight = dataArray[bufferLength - i] * 1;
        context.fillStyle = "white";
        context.fillRect(
          x,
          canvas.height / 2 + 3,
          barWidth / 2 - 5,
          barHeight
        );
        x += barWidth / 2;
    }
    for (let i = 0; i < bufferLength; i++) {
        barHeight = dataArray[i] * 1;
        context.fillStyle = "white";
        context.fillRect(
          x,
          canvas.height / 2 + 3,
          barWidth / 2 - 5,
          barHeight
        );
        x += barWidth / 2;
    }
requestAnimationFrame(animate);
};
5 Let's tidy up things
Here is the finished code.
const canvas = document.querySelector("canvas");
const context = canvas.getContext("2d");

canvas.width = window.innerWidth;
canvas.height = window.innerHeight;

const audio = document.querySelector("audio");
audio.addEventListener("playing", (evt) => {
const audioContext = new AudioContext();
const audioSource = audioContext.createMediaElementSource(evt.target);
const analyser = audioContext.createAnalyser();
audioSource.connect(analyser);
analyser.connect(audioContext.destination);
analyser.fftSize = 64;
const bufferLength = analyser.frequencyBinCount;
const dataArray = new Uint8Array(bufferLength);
const barWidth = canvas.width / bufferLength;
let barHeight;
let x;

const animate = () => {
    context.clearRect(0, 0, canvas.width, canvas.height);
    context.fillStyle = "white";
    analyser.getByteFrequencyData(dataArray);
    x = 0;
    for (let i = 0; i < bufferLength; i++) {
        barHeight = dataArray[bufferLength - i] * 1;
        context.fillStyle = "white";
        context.fillRect(
          x,
          canvas.height / 2 - barHeight - 3,
          barWidth / 2 - 5,
          barHeight
        );
        x += barWidth / 2;
    }
    for (let i = 0; i < bufferLength; i++) {
        barHeight = dataArray[i] * 1;
        context.fillStyle = "white";
        context.fillRect(
          x,
          canvas.height / 2 - barHeight - 3,
          barWidth / 2 - 5,
          barHeight
        );
        x += barWidth / 2;
    }
    x = 0;
    for (let i = 0; i < bufferLength; i++) {
        barHeight = dataArray[bufferLength - i] * 1;
        context.fillStyle = "white";
        context.fillRect(
          x,
          canvas.height / 2 + 3,
          barWidth / 2 - 5,
          barHeight
        );
        x += barWidth / 2;
    }
    for (let i = 0; i < bufferLength; i++) {
        barHeight = dataArray[i] * 1;
        context.fillStyle = "white";
        context.fillRect(
          x,
          canvas.height / 2 + 3,
          barWidth / 2 - 5,
          barHeight
        );
        x += barWidth / 2;
    }
    requestAnimationFrame(animate);
};
animate();
});
6 Here's a working demo
7 Next Steps
If you managed to reach the end of this tutorial, well done! Give yourself a pat on the back!
As mentioned, all the source code is available on Github at:
https://github.com/disruptionlaboratory/audio-visualiser-tutorial